Setting up a Blog using Jekyll - Part2
Hello All!
In the previous post, we used Jekyll to build a website.
In this post, we will see how we can use disqus to add a comments section to every post and make our blog complete.
Disqus is a blog comment hosting service for websites. As Jekyll doesn’t have any backend, it cannot handle and process comments. So, we have to use some other method which will allow us to comment on posts. That other method is Disqus.
Let us get started!
Step1: Creating a disqus account
It is as simple as creating an account in any other website. Go to disqus website. You can use your Google, Facebook or Twitter accounts to Signup.
Step2: Set up Disqus on your site
-
Login into your disqus account.
-
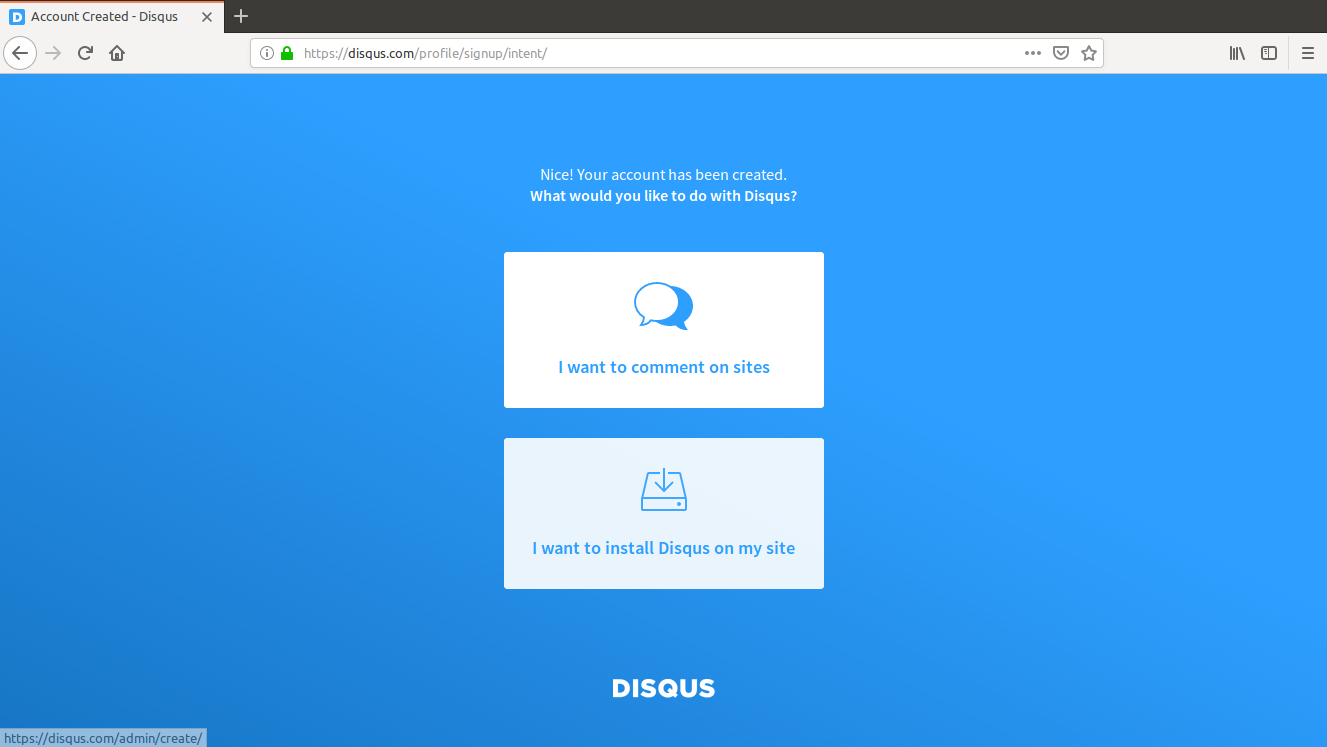
You will get 2 options like this:

- Choose the I want to install Disqus on my site option.
-
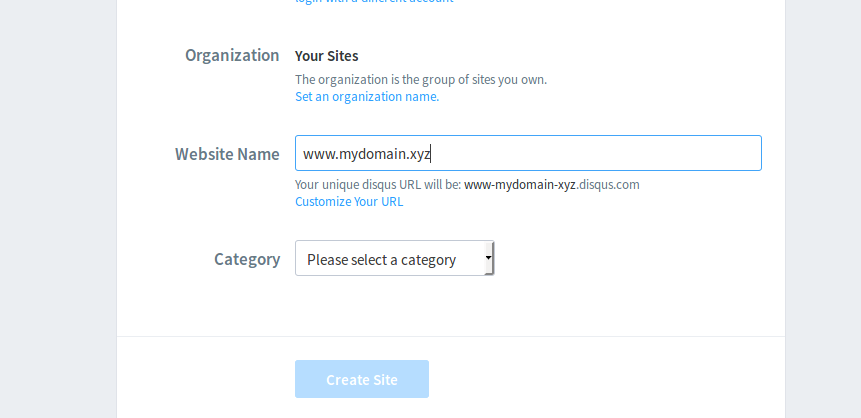
You will be redirected to a page with the following fields:

-
Under Website Name, enter your website name. If you are using a Custom URL like www.mydomain.xyz give that as your Website Name. If you are using username.github.io, then give username.github.io.
-
As soon as you enter the Website Name, a disqus URL is generated. Observe in the above screenshot. The disqus URL for Website Name = www.mydomain.xyz is www-mydomain-xyz.disqus.com.
-
This disqus URL is important to remember. And, the disqus shortname is www-mydomain-xyz.
-
After getting disqus URL and shortname, choose a category. My blog is a Tech blog. So, I chose Tech. You choose what suits your site.
-
Then Create Site .
-
-
You will be redirected to a webpage where you will have to choose your Platform. We are using Jekyll, so choose Jekyll.
-
Then, you will get Jekyll install instructions. Look at this screenshot:

-
You will get something like this. Click on the Universal Embed Code.
-
Copy the Embed Code. it is basically Javascript code.
-
-
In the directory username.github.io, create a directory _includes and get into it.
username.github.io$ mkdir _includes username.github.io$ cd _includes -
Create a file with name disqus_comments.html .
username.github.io/_includes$ touch disqus_comments.html -
Open disqus_comments.html using a text editor and paste the Universal Embed Code you had copied in 5. Save and close the file.
-
Now open the _config.yml and add the following to it.
disqus: shortname: "www-mydomain-xyz"-
That shortname is the disqus shortname in 3rd point of 3.
-
Save this file.
-
-
The Front Matter in any post should have the comments: true option. Example:
--- layout: post title: Setting up a Blog using Jekyll - Part2 categories: Blogging comments: true ---- Suppose you don’t want comments for a particular post, just put false instead of true.
-
Commit the changes and push everything to your repository.
-
We are still not done. One last step is left. Go back to your browser. We were here: Jekyll install instructions.
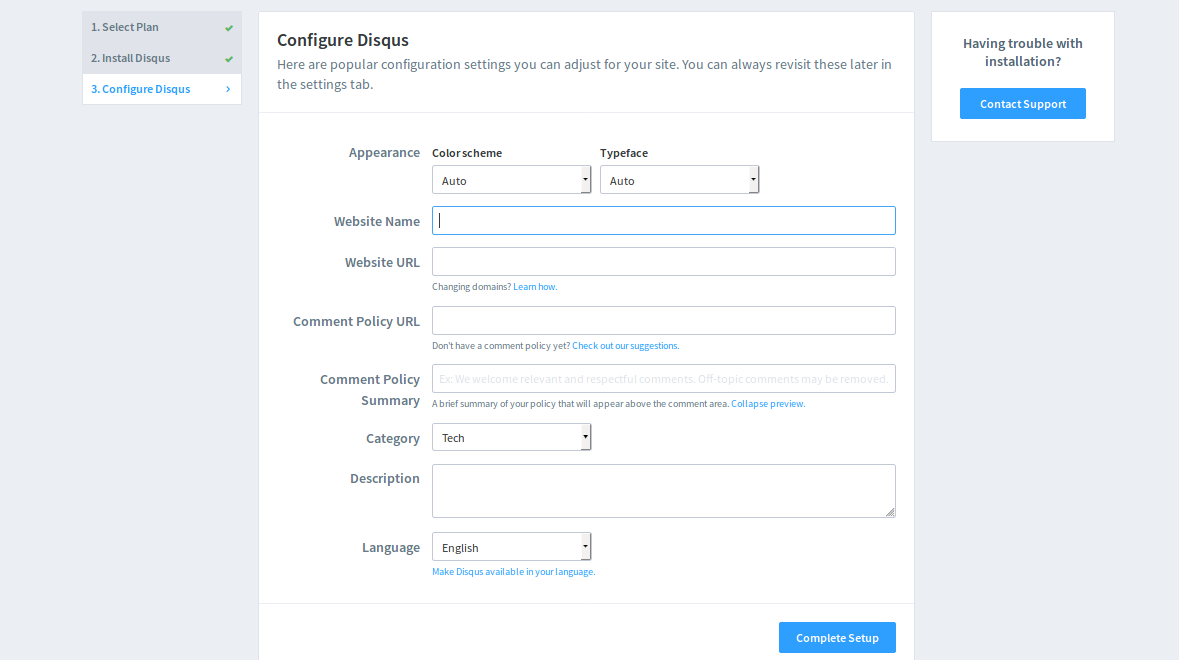
- Click on Configure. It should redirect you to a page which looks like this.

-
Enter your Website Name - < website_name >
-
If you have enforced HTTPS(refer previous post) Website URL should be this: https://< website_name >.
-
For Comments Policy URL, there are a few options you can choose from. Checkout the suggestions and decide. You have to copy the URL where the Policy is present and paste in that field.
-
Comment Policy Summary: How do you think people should comment on your site? Write that.
-
Choose the Category.
-
Write a small note to the people who comment in the Description Field.
-
And then Complete Setup.
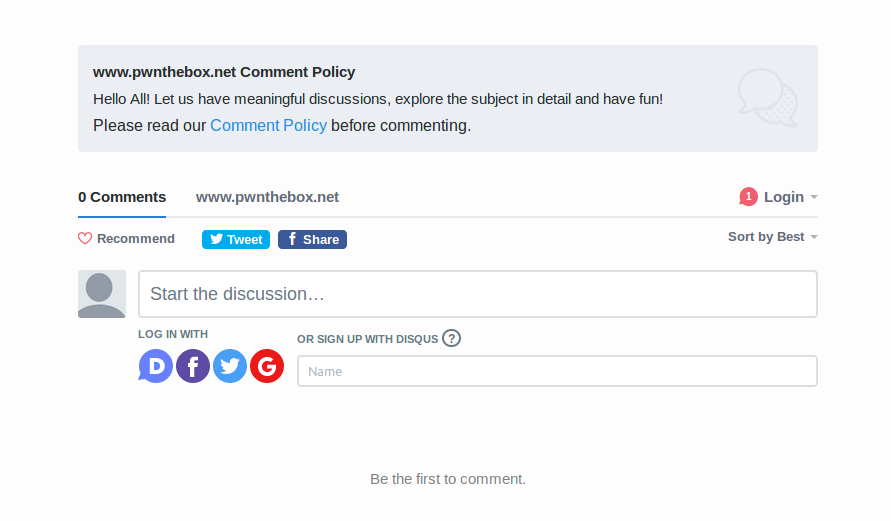
With this, you would have successfully installed Disqus Comment System to your Website. This is how it would look like:

Congratulations! You now have a complete website!
Thats about it. I hope you were able to get disqus working on your website. If not, feel free to leave a comment below. Let us work it out!
Happy Blogging!
Bye!
PS:
We did something to make it happen, but never really thought what exactly we did. So, I will explain it here.
-
Execute the following command and observe the output.
$ gem environment RubyGems Environment: - RUBYGEMS VERSION: 2.6.11 - RUBY VERSION: 2.4.1 (2017-03-22 patchlevel 111) [x86_64-linux] - INSTALLATION DIRECTORY: /home/adwi/.rvm/gems/ruby-2.4.1 - USER INSTALLATION DIRECTORY: /home/adwi/.gem/ruby/2.4.0 - RUBY EXECUTABLE: /home/adwi/.rvm/rubies/ruby-2.4.1/bin/ruby - EXECUTABLE DIRECTORY: /home/adwi/.rvm/gems/ruby-2.4.1/bin - SPEC CACHE DIRECTORY: /home/adwi/.gem/specs - SYSTEM CONFIGURATION DIRECTORY: /etc -
The INSTALLATION DIRECTORY is the directory where gems and related code are stored. So, as minima - the theme is also a gem, it will also be stored there. Let us check it out. And my INSTALLATION DIRECTORY might be different from yours. But the following steps are the same.
$ cd /home/adwi/.rvm/gems/ruby-2.4.1 ~/.rvm/gems/ruby-2.4.1$ ls bin build_info cache doc environment extensions gems specifications wrappers-
We need to find minima which is a gem. So, enter the gems directory.
~/.rvm/gems/ruby-2.4.1$ cd gems
-
You will probably hundreds of gems. Enter the minima directory.
~/.rvm/gems/ruby-2.4.1/gems$ cd minima-2.5.0 ~/.rvm/gems/ruby-2.4.1/gems/minima-2.5.0$ ls assets _includes _layouts LICENSE.txt README.md _sass
-
There are 4 Directories. The one at interest is the _layouts. This directory has the template for a every type of webpage - a header page, a post, home page. Let us get into that directory.
~/.rvm/gems/ruby-2.4.1/gems/minima-2.5.0$ cd _layouts ~/.rvm/gems/ruby-2.4.1/gems/minima-2.5.0/_layouts$ ls default.html home.html page.html post.html
-
When you do layout: post in your blog post, the template in post.html is taken to generate the html file. I hope you are getting a general idea of how everything is working. Let us open post.html and check it out.
-
These are the last few lines in the post.html.

-
Let us understand the code there. if site.disqus.shortname - If the site has a disqus shortname, then include disqus_comments.html. This is exactly why we added en entry in the _config.yml file - Look at (9) of Step2. Now, the if condition is true because our site has a disqus.shortname.
-
Coming to the include disqus_comments.html. We created a Directory with name _includes, created a file with name disqus_comments.html in it - Refer (6), (7) of Step2.
-
After creating that file, we pasted the Universal Embed Code into it - Refer (5), (8) of Step2.
-
What include disqus_comments.html does is, when Jekyll generates the html page of a markdown file, the contents inside disqus_comments.html is copied into that html page. The include is responsible for that copying action.
-
To confirm this, I opened the Source of one of my blog posts on the browser and found this:

- What does the disqus_comments.html have, it has the Universal Embed Code which is Javascript code. So, this Javascript code is being embedded to every post we write(if comments: true). This Javascript Code gets executed by the browser and we get the comments section.
-
With this, I hope you have understood why we did what we did to enable comments using disqus.